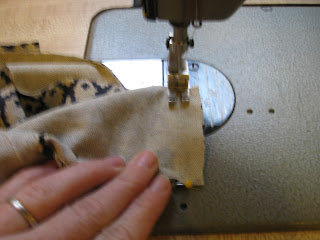
OUTSIDE HAT: Sew first two triangles together using 1/2" seam allowance
Sew all the way to the end of the fabric
When sewing 3rd triangle to the first two...stop 1/2" from edge and backstitch.
All three triangles sewn together...now sew second set of three together
Two sets finished
Set two sets on top of eachother and sew together matching up seams at the top of the hat
continue sewing up and over the top keeping your 1/2" seam allowance
Now it looks like a bowl shape
Clip of excess bulk at the top of the hat (top of triangles)
Topstitch all seams (make three passes up and over the top---optional).
Now everything is topstitched
You want your main seam that sewed the two halves together to go from ear to ear. So position hat and put a pin where it will be center back.
Attatch band starting at center back
When you come back around to where you started pinch your band ends together and make a clip 1/2" out.
Trim off the excess band that you don't need
Now sew the ends of the band together

Now finish the seam opening the seam allowances on the band.
Fold all the seam allowance down from the band and topstitch right next to your original seam.
Trim off seam allowace leaving 1/8th of an inch allowance
Lay plastic brim on top of fabric
Make sure the plastic lines up with the seam...sometimes you may need to trim the plastic a bit
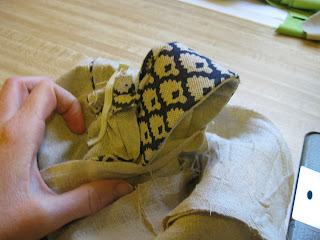
Now flip the brim right side out and insert plastic brim...pushing all seam allowance to the lining side
Pull fabric tight around the plastic and pin it shut, then trim off the allowance down to a uniform 1/2" (when you pull the fabric tight, the allowance ends up too large)
Find your center front and pin (fold your hat in half an pin opposite your center back seam)
Mark the center of your brim with a pin. Now line up your two center front pins and pin the brim onto the main body
Start sewing your brim on... you will have to pull back the band while you sew to line up your raw edges
See how I am holding the band back with my fingers while I sew the brim on. Just get it sewn on to center front and then you can let your fabric pivot to get the other side on.
After you have the brim on you can try on your hat for size. Elastic on the back. Start at the edge of the tringle that is centered over your center back seam. Back tack a vertical seam then pivot.
Sew directly on the elastic and stretch it as you go.
See how I am stretching it as I go.

When you get to the end of the triangle pivot and back tack, then clip off the elastic you didn't use. If the hat is a little roomy pull the elastic more. If the fit is pretty good, don't pull very much.
Now your outside hat is finished. Repeat steps to make your lining...you will only need to sew the six triangles together and attatch the band. If you are making a fully reversible hat topstitch the lining and add elastic to the back
Once your lining triangles and band are sewn together, place the outside hat inside the lining right sides together matching up your center back seams. Pin together at center back. (Your brim will be folded down in between both layers)
Pull hat taught at center back and center front and put a pin in at center front
Sew the linng and outside together starting a few inches over from center back
When you get to where the brim was sewn on...stitch right on top of that existing seam
Come all the way around back to where you started and stop a few inches from center back, so that you leave about a 3-4" opening
Reach inside and fold the brim in half and pull through the opening
Fold in raw edges at center back to close your opening and pin shut.
Sew opening closed and continue around the base of the hat topstitching your lower edge.
When you get to the brim...pull your top fabric and lining fabric away from the brim, so that you get a nice even topstitch that goes through the top and bottom.
Just work with the brim as your are topstitching around...keep pulling the lining fabric out away from the brim
Now you have your completed hat
View from back/side
Top view.


No comments:
Post a Comment